 |
ADVANCED CHARACTER SET UP
IN MAYA 3.0
Translation/Orientation Controlls
|
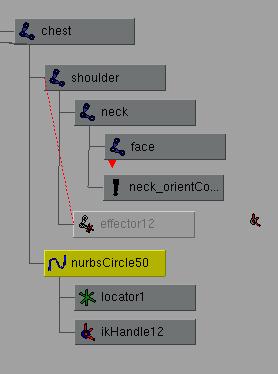
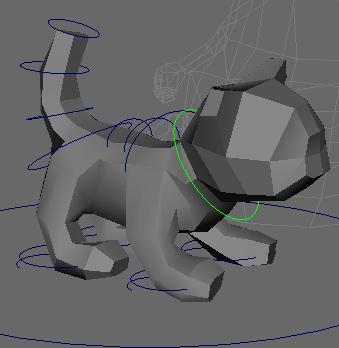
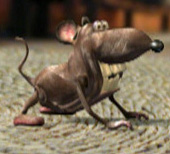
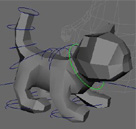
As you can see above the controls are curves. These don't render and are easier to pick then the IK itself and you have more control over them as we will see bellow. Let's start with Translation and Orientation Controls: this is for stuff like hands and arms where I want a control on the wrist that I can use to move the whole arm around with IK and also rotate to move the hand. On the cat I have a control like this on his head so he can rotate his head and also crouch down with his shoulders. In the picture above this curve is picked (green).
Translation/Orientation Controlls
Translation Control
1) In the modeling view, snap the curve's position onto the joint (like the wrist)2) In the hypergraph, parent the curve to the skeleton, (see above illustration). What is important is that the curve is one level higher than the influence of the IK's effect (the little red dotted line).
3) Freeze transformations on the curve. This is so you don't have crazy values when you begin animating.
4)Parent the IK handle to the Curve. Now you have the transforamtion controlls, next we do the rotations:
Orietation Control
5) Parent a locator to the curve, and snap its position to the same joint as the curve too.6) Orient constrain the locator to the rotating joint (the hand for instance).
The Locator is so you don't have to worry about local axis rotation, if it flips anyway when you constrain it, You may have to adjust the local axis rotation of the joint so it is the same as the locator.
Continue to next section:
TOE ROLL SET UP >>>

(c) 2003, All Rights Reserved. "Make Links not Copies"